First things first, make your batter. This cake was red velvet so if you're going to make a red velvet cake, keep in mind that it will get on things, namely your clothes if it splatters, and it doesn't come off easily! The red food coloring used usually gets on things so don't wear your coolest outfit to make this delicious cake. Once you make the mix, it's off to the oven to bake (you can see me here taking the picture. I'm definitely not a professional photographer lol). As it is baking, you can start making your batter for the next level. Most cakes are 2-3 layers depending on depth of pan and on servings needed as well as client's order.

This was a huge pan and you have to be very careful with cooking times because if left too little time, you end up with a wonderful gooey center. Gross! Left too long, you end up with burnt outer edges. Crunchy is not the way you want your cake described as. When you take out your pan, you should let it cool for a good 15 minutes then flip it over to a cooling rack. You need to let it cool completely. DO NOT flip a hot cake on to a rack. It will break down. Once on the cooling rack, let it cool completely!! A big no-no is leveling (making even) a hot cake. Not a good idea!!

I leveled my cake which you can do with a serrated knife or other leveling tool. You want a perfectly level cake before you begin carving your design. This picture below shows one of my layers of the cake leveled and carved into the cross shape I wanted. Take your time when carving or you have to make an entire new cake. Big waste of time and batter!

Once you have carved your cakes, make your delicious frosting. This cake was ordered with a cream cheese buttercream. SOOOOOOOOOOOOOOOOO GOOOOOOOOOOOOOOOD! Here's my stand mixer whipping away.

Next step, frost your entire cake and let it sit for 15-30 minutes. This is often referred to as a "crumb coat" and it will help the crumbs to stick so your next layer of frosting covers the cake entirely. This is extremely important with lighter frosting and dark cakes such as red velvet and chocolate.

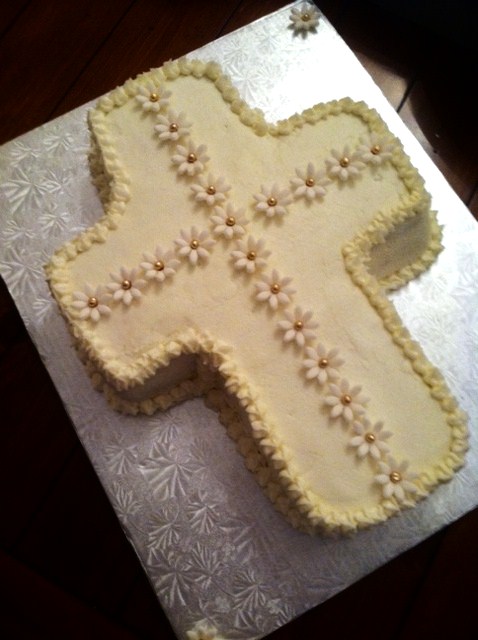
During this period, I made my decorations and let them dry. This cake needed 24 fondant flowers that I made and set out to dry over night. The buds in the middle of the flowers were also made out of fondant and painted in gold. The next morning the flowers were applied to my finished cake to complete a beautiful communion cross cake for a special little girl.
I hope you enjoyed this journey. If you have any questions, please feel free to email me at mcakesdesigns@bellsouth.net or to post them here in the comments section.
Until next time, I'm off to bake again..... What else is new?! :-)
No comments:
Post a Comment
Note: Only a member of this blog may post a comment.